MIT App Inventor: Build AI and IoT Apps with Raspberry Pi and ESP32
“The hardware-oriented chapters show how smartphone apps can communicate with Raspberry Pi Pico W, Raspberry Pi 5, Arduino UNO R4 WiFi, and ESP32 systems using Wi-Fi, Bluetooth Classic, and Bluetooth BLE.”
Category Archives: Programming Method
Low-Code Software Development
What is Low-Code? – by Sophie Becker – Technically (substack.com)
Read the linked article.
Way back in my college days, we learned to program in everything from assembly language up through “high level” programming languages. Some of us even learned to enter boot strap code using front panel switches to enter machine code as bit patterns on a console!
And then the hard code folks who said their programming language was solder (author Terry Pratchett, for example, or Bob Pease, or Steve Ciarcia).
Today, programming is simplified – tools like App Inventor illustrate this by using “drag and drop” programming methods, assembling programs from components, rather than typing in programing instructions.
Low Code does not necessarily divorce oneself from understanding programming concepts – but it enables the rapid construction of many functions – from user interfaces to underlying algorithms.
AI-based systems introduce a new level of automated code assembly. Go to Chat GPT, for example, and ask it to implement a sorting algorithm in Python – and sure enough, it will generates the source code in Python.
Two or three decades ago, the typical output of a software developer was likely to be a few hundred lines of code per day (at best, after integration, testing, and future modifications before final ship). New tools likely increase this by an order of magnitude and more!
2/3rds of programming projects expected to use “low code” tools by 2025
App Inventor is a “low code”, visual software development tool. Such “drag and drop” programming tools enable non-programmers (and programmers) to create many types of applications without the details of traditional programming code.
This leads to an important issue – will less trained/less experienced programmers inadvertently introduce security problems in their applications?
Gartner predicts that by the end of 2025, over 65% of development projects will use low-code builders. The field of low-code continues to expand. But what security implications does low-code introduce? Low-code refers to tools that enable application construction using visual programming models. Adopting drag-and-drop components instead of traditional code, no-code and low-code platforms enables non-technical folks to construct their own workflows without as much help from IT. Yet, handing power to citizen developers with less security training can be risky. Plus, low-code platforms may hold compromised propriety libraries or leverage APIs that may unknowingly expose sensitive data to the outside world. There’s also the possibility that low-code could increase shadow IT if not governed well.
Calculating a square root value
A reader asked a question about how square roots can be calculated, referring to an example in my Volume 1 Introduction to App Inventor e-book. He was confused by the explanation of how it works – so I have written an expanded explanation of the method for calculating a square root of a number.
You could use the built in Math function to find the square root of a number – and generally that is what you should do. But if you would like to learn a method of calculating the square root of a number – then read on!
2,000 years ago, Greek mathematicians identified a method of finding approximate square roots. The method makes an initial guess of a square root (which is often not even close to the right value) and then repeats a sequence of dividing and averaging which gradually refines the initial guess into an accurate square root. To find the square root of some number n, we set our initial guess to n (which we know is not correct), and then calculate an average of our guess with n divided by our guess.
To find the square root of 30, we initially guess the square root is 30 (which we know is wrong). We then take 30 and divide it by our guess, which in this case is 30. This gives us a value of 1. The average of our original number 30 and our divided value is 15.5. We select 15.5 as our new guess.
This little spreadsheet may help understand how the square root concept works.

To find the square root of 30, we initially guess the square root is 30 (which we know is wrong). We then take 30 and divide it by our initial guess, which is 30. This gives a value of 1. The average of our original number 30 and 1 is 15.5. We select 15.5 as our new guess on the next row down in the Guess column.
Then we repeat this and take 30 divided by our new guess of 15.5. This gives us 1.93548. We average our 15.5 guess with our new value of 1.9458 giving us 8.717, which becomes our new guess on the next row down.
We repeat again using 8.717 as our new guess and divide 30 by 8.717, giving us 3.44. We average the 8.717 with 3.44 giving us 6.0795, use that as our next guess.
When do we stop this repeating cycle? We could repeat this a set number of times, say six, and then stop. But a better solution is to specify how many digits of accuracy we would like to have in our answer.
Let’s say that 5.4 is accurate enough for our purposes. We could stop as soon as our new guess is within 0.1 of our prior guess. In our spreadsheet above, our generated guesses are:
- 15.5
- 8.717742
- 6.0795
- 5.507058
- 5.477306
- 5.477226
As you can see, the correct answer has converged to 5.477 rather quickly. If we wanted an accuracy of just 1 digit to the right of the decimal point, we can stop once the difference between the current and previous guess is 0.1
The first digits of the last two guesses are the same 5.4 so we could stop with an accuracy of .1. In this particular calculation, we see that we are accurate to the thousandth’s place 5.477 as these values are no longer changing.
We stop the cycle when the difference between guesses becomes very small.
With our definition of small to 0.1, we stop at 5.4. If we set our definition of small difference to 0.001, then we stop at 5.477.
Here is some sample App Inventor code that calculates the square root. It fetches the number for which we find the square root from a user interface Text Box named txtDataEntry. We set NewValue (our initial guess) to this value. Then the code uses a while test loop to repeatedly do the calculation while the difference between our new guess and our previous guess is greater than 0.1 (you can change this to smaller values for greater accuracy).

This square root calculation repeats as long as the difference between our NewValue and OldValue are large.
As long as the difference remains large, the while test condition is “true”, and the code inside the while block continues to execute. However, once the difference becomes small, the test condition evaluates to “false” and the the execution of the “do” section stops. We have found our approximate square root.

An App Inventor recommended way of handling multiple similar screens
MIT App Inventor supports apps having multiple screens, but due to the way that App Inventor is implemented, they recommend that apps have no more than 10 screens total – or risk running out of memory or seeing the Blocks editor crash or hang!
They have a page of information about this issue and you should look at that if you are writing an app with more than about 10 screens.
They suggest it may be possible to simulate multiple screens using just one extra screen, depending on the application. They provide hints as to how to do those hints may be insufficient for new App Inventor programmers.
A reader asked for help on this so I created this tutorial.
Since this app has two screens, this tutorial is split into two sections, one for each screen, and then a third section discussing optional modifications.
The basic app is called ManyScreens. The optional modifications are in ManyScreens2_Buttons (source code links at end of this post)
User View
This demonstration app features 4 buttons – the first button displays “Screen 1”, the second button displays “Screen 2” and so on. These buttons could have any label on them appropriate for your application, such as “Register Account”, “Reserve a space”, “Display reservations” or what ever make sense for your app.
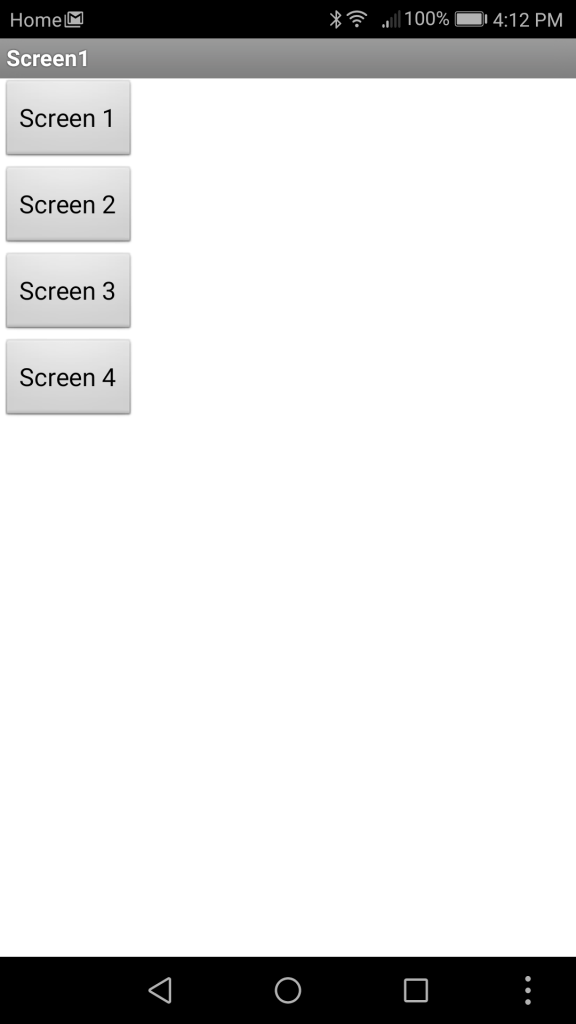
Pressing Screen 1 displays this screen – note the label at the top and the photo on the page.

This screen appears when pressing Screen 3. Note that the text label references Screen 3.

The button Do Something! is a placeholder for adding code to do something unique for this screen. For this application all it does is close the screen and return to the main app screen, Screen1.
Continue reading An App Inventor recommended way of handling multiple similar screens

How to center an image on the screen using App Inventor
A reader asked, “How can I center an image on the screen in an App Inventor app?”
There is an easy way to do this and there is a more complicated method (using the Canvas and other graphics objects). In this tutorial, we show the easy way to center an image on screen!
Our app uses the camera to take a photo and then displays that photo on screen. A secondary feature of the app demonstrates how the “image object” in App Inventor is the filename where the image is stored. In this way, the “image object” can be stored in TinyDB – its not really the binary data representing the photo or image – it is, in fact, just the filename. (TinyDB only stores text).
User Interface View
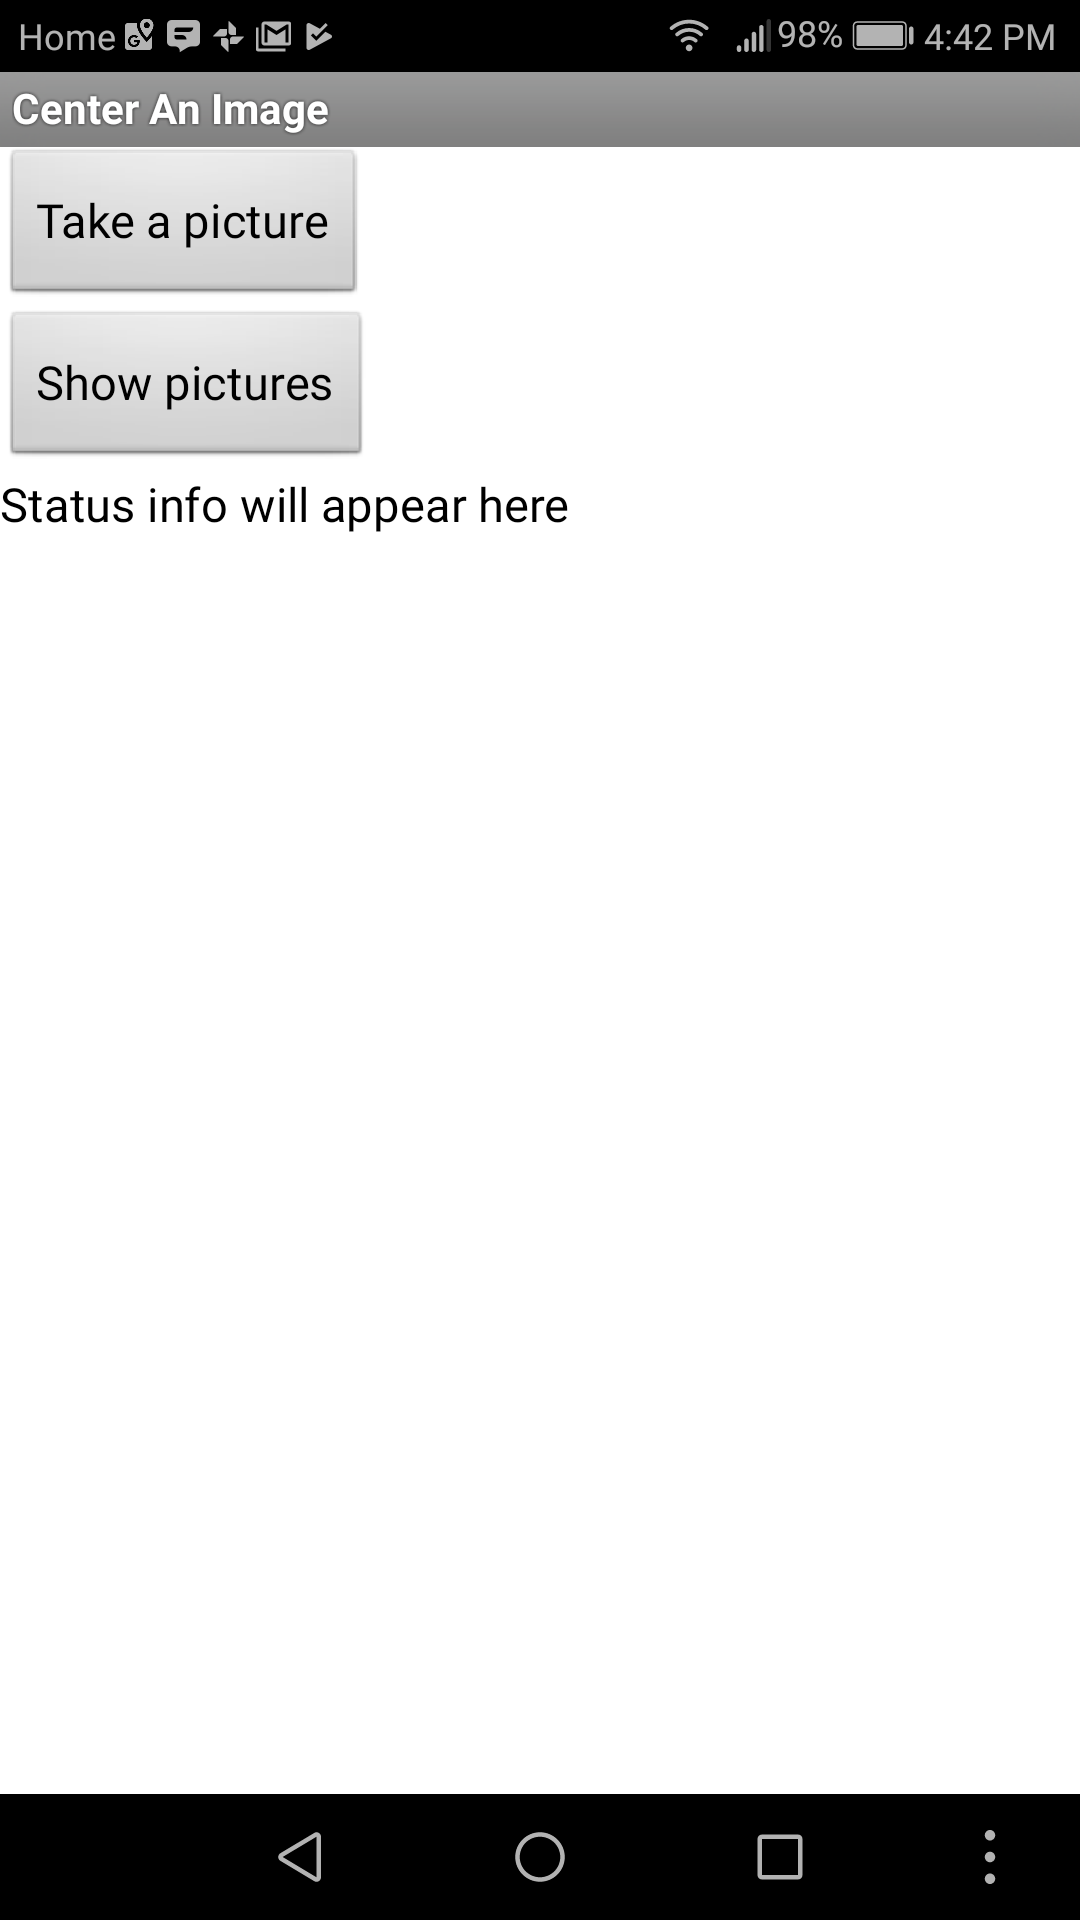
To demonstrate image centering, we use the camera to take a photo (creating the image) and then a Show pictures button to display the image on screen.
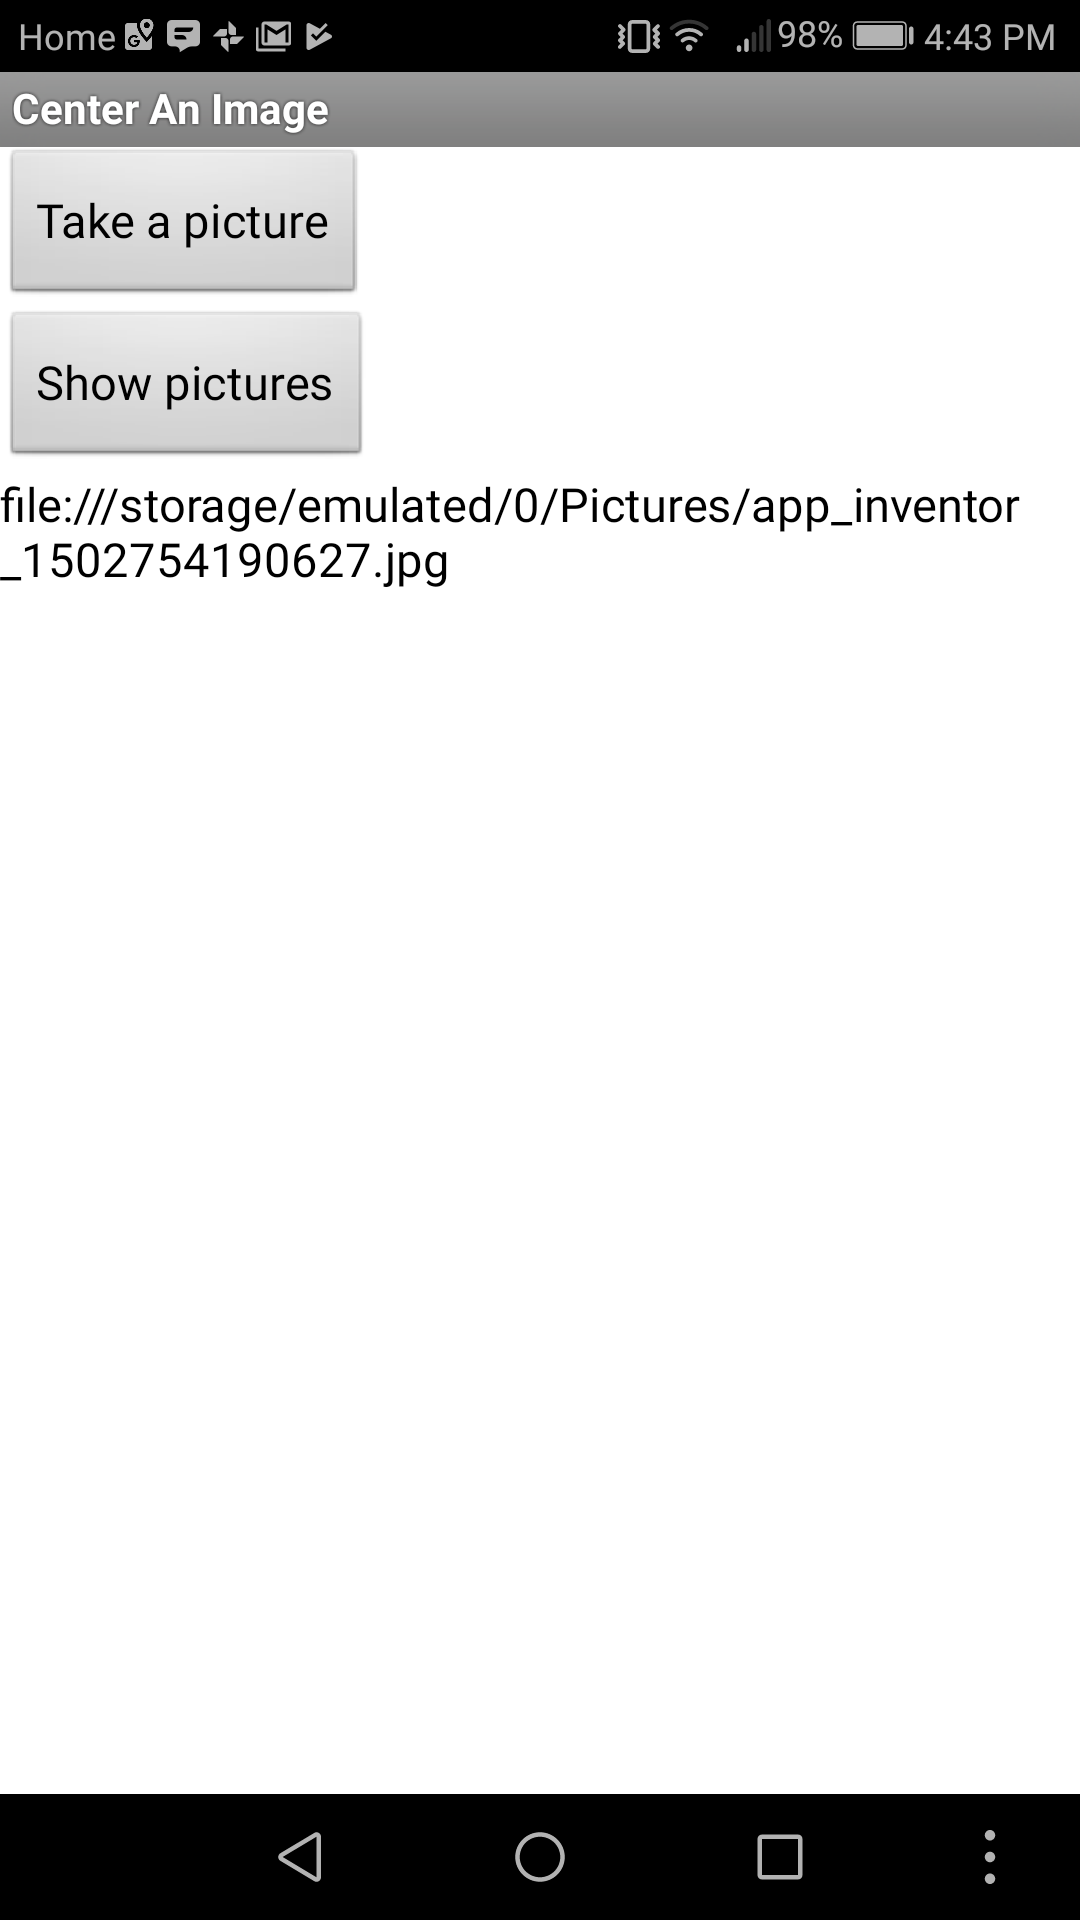
When you press Take a picture, the app launches the Android camera app to take the photo. When done taking the photo, click on the “check mark” (as it appears on my Android 7 phone) at upper right of the screen. The camera app returns to our app, which displays the file name and location on our Android device where the JPG image file has been stored.
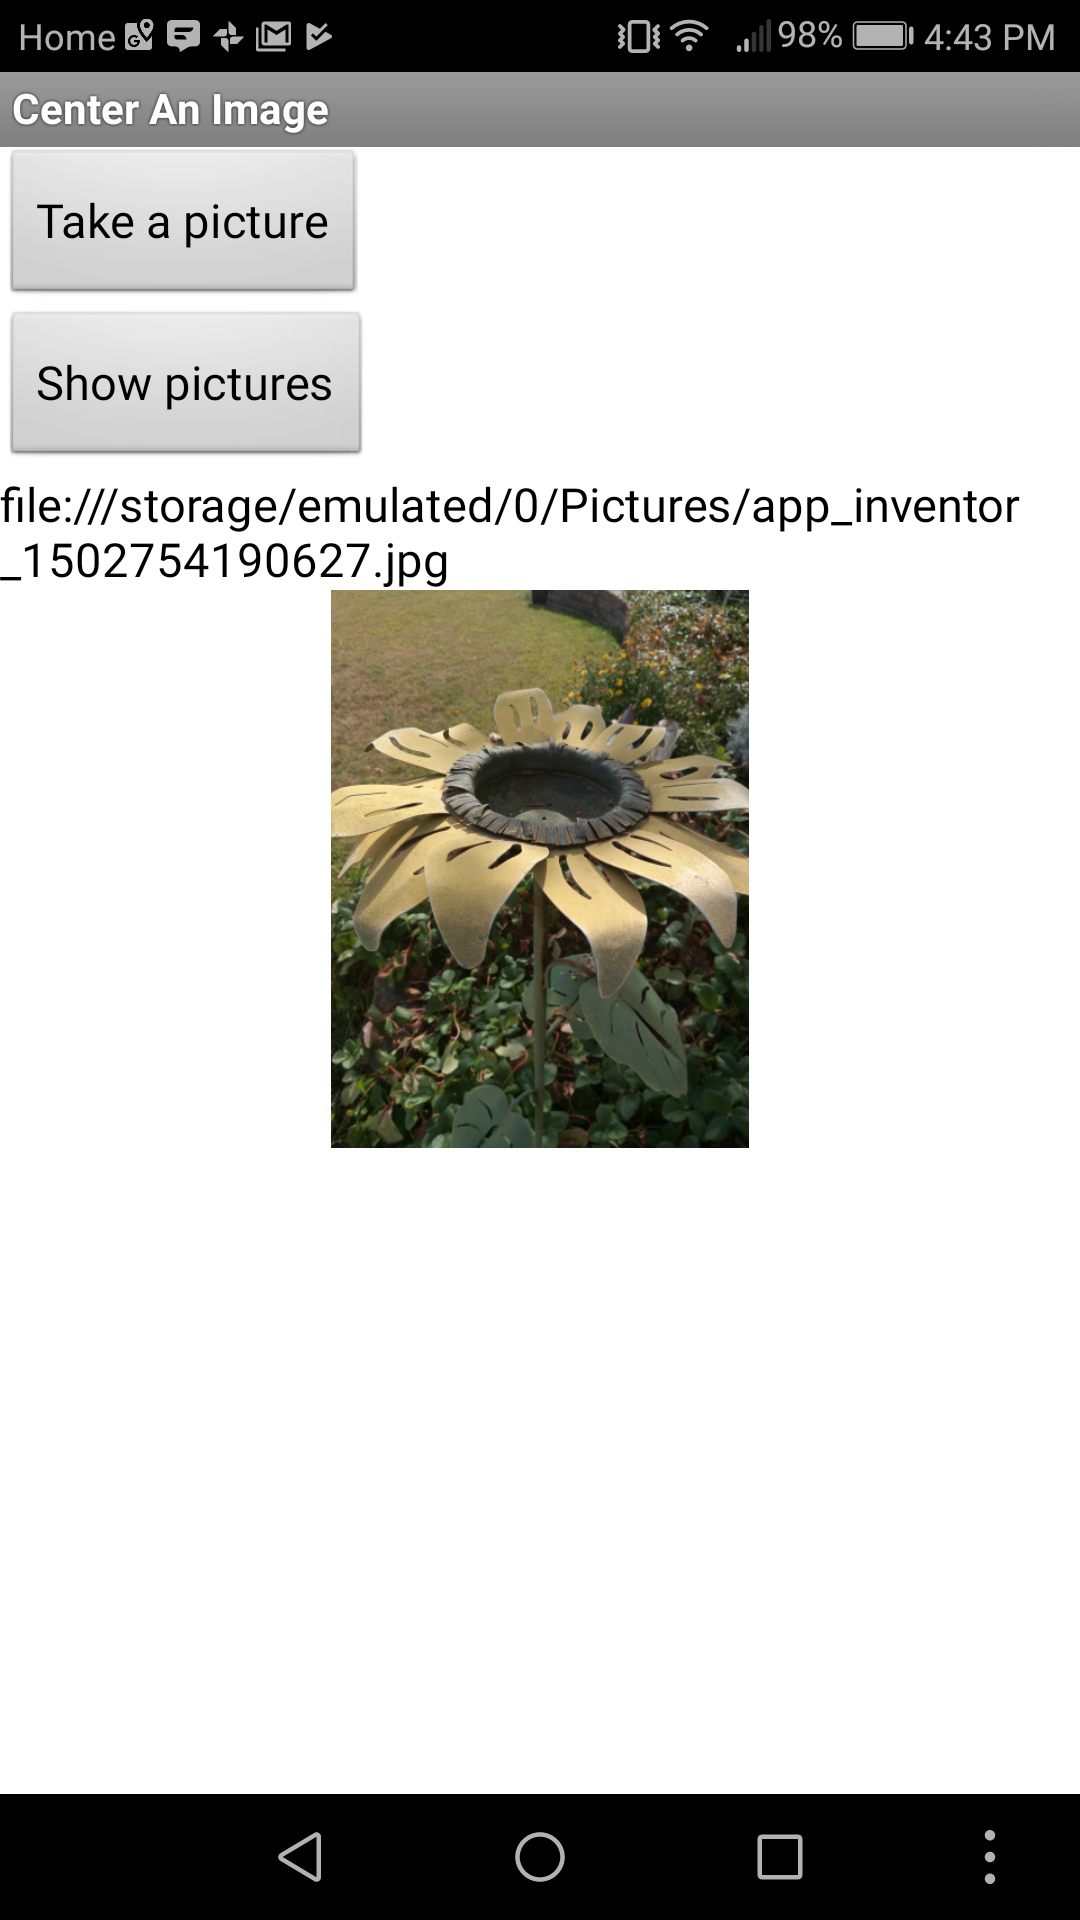
Press “Show pictures” to display the photo. The default image size is small – but centered! We will see how to show the photo at a larger size.
Designer View
Continue reading How to center an image on the screen using App Inventor

Can App Inventor have a button or control that rotates on screen?
A reader asked: Is there is a way to have a control, such as a button, rotate on the screen?
With a simple trick, the answer is Yes!
The trick is to use ImageSprites that are made to look like buttons. Then, instead of .Click event handler, as used on a Button, we use one of the “touch” events defined for the ImageSprite class. To rotate the sprite, change the sprite’s Heading property. Easy!
If you would like to learn more about ImageSprites, please read my online tutorial “Using ImageSprites for animated App Inventor Graphics”.
I’ve also written an inexpensive 227 page e-book all about graphics, animation and charts available from many online e-book outlets. You may find that text helpful to you as well.
Tutorial Video
The tutorial is shown here as a video – or page down for a written version of the tutorial.
User View
Watch this video to see what a rotating button looks like:
Designer View
Creating the user interface is the same as creating other App Inventor user interfaces – except we use a graphical drawing area called the Canvas and add an ImageSprite to the Canvas.
Continue reading Can App Inventor have a button or control that rotates on screen?
Google introduces Blockly 1.0 for Android, iOS and web
If you have used MIT App Inventor (and of course you have!), you can quickly adapt to using Blockly for programming. Blockly is basically a “Drag and Drop” code editor (like in App Inventor), providing a visual programming system. It uses the same ideas as MIT App Inventor.
To see it in operation, visit MIT’s Scratch project to create a simple program.
Google has released code libraries that, when combined with other tools, enable use of Blockly to create code for the web, for iOS and Android. For iOS you also need XCode and for Android you need Android Studio. Blockly is not a programming language itself; it outputs code in JavaScript, Python, Lua and other formats.
Source: Google Developer’s Blog
WATCH THIS VIDEO!
(FYI I am half way through my period of traveling too much and not getting much programming done!)
QuickSort routine for your App Inventor Apps!
Sorting data is a common need in many applications. If you have thought about writing your own sorting routine, you likely came up with a scheme that picked the first data item, and then compared it to each of the other elements to find a smaller value (if sorting into ascending order) or a larger value (if sorting into descending order). Finding a match, you switch the two values in your list of data.
Gradually, as you scan the list, the smallest (or largest) value bubbles up to the front of the list. Once the whole list is scanned, you have found the smallest (or largest) value and switched it to the beginning.
Then you would start with the next data value and compare it to the remaining data values. And so on.
Great idea if you came up with this – seriously! In computer science algorithms, this is known as the “bubble sort”. It works fine – but it has one problem – as the number of items to be sorted grows, the time it takes to do the sort grows even faster.
In fact, we say that a bubble sort runs in a time proportional to n^2 (n squared). If there are 10 items to sort, this will take 10^2 or 100 time units to sort.
If there are 30 items to sort, this will take 30^2 or 900 time units to sort. Just going from 10 items to 30 items adds 800 time units to our sorting time! Ouch!
As you can see, the bubble sort is simple but it can take a long time to run!
Computer scientists have invented other ways to sort data. One of the best known has the descriptive name “QuickSort”. In many cases, it’s sorting time is on the order of n ln n (that is n times the natural logarithm of n).
If we compare that to the Bubble Sort for n=10, we get 23 time units and for n=30, we get 103 time units. As you can see, QuickSort is much faster than the Bubble Sort.
Continue reading QuickSort routine for your App Inventor Apps!

Part 1: Storing and accessing user interface components as variables
App Inventor programmers routinely store values, such as numbers or text strings (“Hello!”) in variables. For example,
![]() stores the numeric value 6 in to the variable TOTALBUTTONS.
stores the numeric value 6 in to the variable TOTALBUTTONS.
To illustrate by example, here is a global variable named SpecialButton. We can initialize it to anything we want at this point.
![]() Next, inside our app, our blocks code assigns Button1 to the variable SpecialButton. SpecialButton now holds a reference to the actual user interface control Button1.
Next, inside our app, our blocks code assigns Button1 to the variable SpecialButton. SpecialButton now holds a reference to the actual user interface control Button1.

Since SpecialButton is a variable and not an actual button, we cannot directly use a SpecialButton.Click handler but we can use a feature of App Inventor to do the same thing in a different way. We will see how to do this in this a bit later.
You can store any App Inventor components – a Clock, a Bluetooth device – any component, in a variable.
Why would you want to do that? We will see in the example in this lesson.
This tutorial is in both written form and as an online video.
Continue reading Part 1: Storing and accessing user interface components as variables
